Showing posts with label Appetizers. Show all posts

22.1.09

Bruschetta Fresca

Julia and I had some fun last weekend having a little “switch-off” dinner. Basically, I go in the kitchen and make a little, creative plate that we share together, and then she goes and does the same. The dishes were small and tasty so we were able to have a few rounds of it. We had a lot of fun eating, relaxing and laughing about our cooking and just stuff in general. You need a bit of time on your hands to play this dinner game, but it is a worthwhile couples activity.

With my first dish, I decided to utilize some of our best ingredients in a simple way with a play on a bruschetta. I took four long, thin slices of beer bread and spread some nice horseradishy mustard on each side. I heated a little Smart Balance in a pan and then put the slices in to absorb a little bit of the flavor and crisp up a bit. I had shredded some amazing sharp, Irish white cheddar and put a nice heavy pinch of it all over the top of each piece of bread before carefully flipping each one, so the cheese ended up on the bottom. I then sprinkled a little more cheese on top of the “bottoms” and let them crisp a little more. Once the cheese on bottom was crisped enough that it was not sticking to the bottom, I flipped the breads again for just another minute. The breads were golden, orange and crispy on both sides and smelling great.

I put two of the thin slices on each plate and then topped each plate with some salad of arugula, diced Roma tomatoes, extra virgin olive oil, balsamic vinegar, sea salt and cracked black pepper, which I had dressed up in a separate bowl on the side. I then shaved off a few more bits of cheddar onto each plate for garnish. All done was my fresh take on bruschetta – less garlic and oil and more greens and mustard flavor.

Julia very much approved of my dish, loving the subtle decadence of the plate without losing its freshness and crispness. I might have said it was the best appetizer served that night if not for the beautiful overeasy egg, kalamata olives and lime yogurt sauce over a toast round that Julia served to me some 20 minutes later. She must have read my 101 favorite foods and known that while balsamic vinegar (#39), extra virgin olive oil (#28), sharp cheddar cheese (#23), arugula (#25) and Roma tomatoes (#51) all appear high on my list – that she could even win me over ME with a perfect egg (#2) and kalamata olives (#11). Although I'm guessing she would have gotten that one right, list or no list.

19.12.08

Julia's Dinner Party: Wine, Sides and Dessert

This is the final installment in the Julia's Dinner Party Series. In case you missed the first three parts, be sure to check out the amuse-bouche, the salad and the entree.

So wine. Two great bottles of red and a bottle of white that my parents brought over added wonders to the enjoyment of the food. The names and specifics of the wines or details about their taste? Not my forte. Might want to wait for my Dad's own review of the dinner. He's the real "winey" one in the family. And he knows a lot about wine too! Couldn't resist.

The sides that I served with the stuffed peppers were a white wine mushroom medley and a winter vegetable mash. The medley was pretty simple. I chopped some white, shiitake and baby Portobello mushrooms and sautéed them in olive oil, salt, pepper and a lot of fresh thyme and parsley (roughly chopped) on medium heat for about 5 minutes. At this point, I added in 8 ounces of Chardonnay, stirred, cranked up the heat to high and covered it. I let it cook for another 8 minutes or so, but I was checking to make sure that I took it off right when all the liquid had been absorbed. I served them as is, and they were great – tender, yet a little crispy from the sauté, and very flavorful from all the herbs and wine. They added a nice flavorful vegetable that was not too heavy. Exactly what I wanted.

The winter mash consisted of three large white potatoes (peeled and chunked), three large yams (peeled and chunked), one medium head of cauliflower (de-leaved and chunked) and one thick, large carrot (peeled and chunked). I put them all in a large pot and filled it up as high as I could with cold water (without fearing bubbling over). With things like potatoes and carrots that you want to turn out fork tender, the key is to bring them up to boiling evenly as opposed to dunking them all in already-boiling water, which would lead to the outside cooking long before the inside. I also added a teaspoon of salt to the water and put the pot over high heat.

I let the veggies boil away for over 25 minutes, stirring them occasionally. I really wasn't timing, since they are done when you can break through a chunk of each type of veggie easily with a utensil. The carrots take the longest, but they get there. When everything was fork tender, I drained them and let them cool for 15 minutes right in the pot. I then used a little mashing utensil to carefully start breaking apart the veggies and combining them together. I continued doing this and folding the less mashed parts toward the top from the bottom until I had an even texture and color. It was a lovely light orange and mashed quite easily without cream, butter, oil or any fancy potato-masher machines. I was pleased, but wanted them to be richer for the occasion. So I drizzled in a small stream of cream as I mixed, until the mash was just a little smoother and creamier. It was only a couple of tablespoons into what had become a TON of mash. Finally I took a red onion and, after finely dicing it, put all the pieces in a frying pan with some hot canola oil and seasoning until all the little bits were golden and crispy (about 8 minutes). I poured the onions and a little of the now-onion-flavored oil over the mash and mixed them in. It added a smoky richness to the mash and really enhanced the flavor. I’m going to definitely keep that little idea in mind for the future. Bottom line, the mash was superb and was the dark horse favorite of the guests. Plus, there was so much that it made for great leftovers. My Mom even suggested reheating so with a poached egg on it. Yum!

Finally, we had dessert, a cake that none other than Julia herself baked (in honor of her Mom’s birthday). It was a double-layered, double-chocolate cake with a chocolate ganache filling and cinnamon butter cream frosting. It was a divine confection and one that had people running for seconds (and coming back the next day for thirds), despite such a large feast. She graduated early from University of Michigan, got a great job and even wowed the crowds at her own dinner party. What a gal! A gal well worth celebrating.


The Saturday group at Julia's next celebration on Sunday.

6.10.08

Little Puffs of Heaven

If you need an absolutely delectable appetizer or finger food, I have an easy and simply lavishing recipe for puffy Asiago cheese straws. I originally gleaned the concept of cheese straws from Ina Garten on the Barefoot Contessa television show. Of course, when I went to make them recently it had been upwards of a year since I had watched them being made and I forgot nearly everything, so I had to improvise a little. Needless to say, they came out better and more luxurious than I ever remember Ina’s looking. Maybe one of my little tweaks actually improved them.

What you end up with is a golden, flaky “straw,” with deliciously nutty Asiago cheese melted throughout. They are a little on the rich side, but you can cut them into hunks or cubes and serve more people from them. Or you can enjoy an entire straw yourself! They are as tender and buttery as you can imagine, and the girls I served them to could not stop oo-ing and ah-ing.

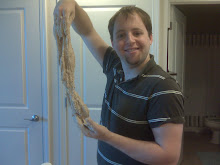
You need a few ounces of Asiago cheese, shredded with your grater, Micro planer or food processor. You also need one sheet of thawed, store-bought puff pastry. As Ina would say, get the “all-butter” variety (read: no trans fat, but this is no health food). Truthfully, that is all I remember from her recipe. I rolled out the puff pastry a little bit so it was thinner than the standard sheet. I then drizzled a little extra virgin olive oil over the top and rubbed it in with my hands, so that it lightly covered the entire sheet. Then, I sprinkled the cheese evenly over the surface and sprinkled just a little salt and pepper. I sliced it into four “straw”-like pieces length-wise and twisted the puff strips like a ribbon as I laid each down next to one another on a cookie sheet. Most of the cheese side ended up covered, on the inside of the ribbons. That was just fine. I sprinkled a little more grated Asiago over the tops and then stuck them in a 400 degree oven for 12 minutes.

I took them out and was simply wowed by how puffy and soft and crispy they were. I let them cool for 5-10 minutes and then we all dug in. They were gone in a finger-licking blink of an eye, but they were so easy that these fan favorites will be made again very soon!